

DHT11 is a quite simple to use component. It has low precision and is quite slow to read, but is good enough for most ambient control applications. It consists of a resistive humidity sensor and a Negative Temperature Coefficient (NTC) thermistor, both controlled through a 8 bit micro-controller chip that translates measured values to numbers through a serial communication line. The micro-controller also has calibration parameters programmed. It has four pins.
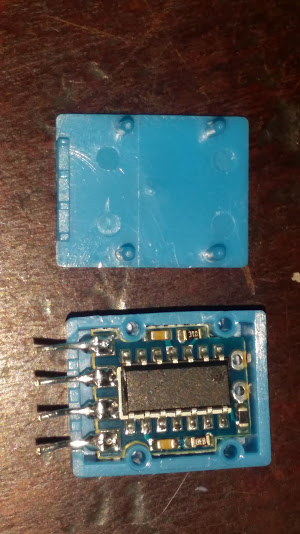
Pin 1 is the VCC power supply ranging from 3.5 to 5.5V DC. Pin 2 is the DATA serial pin, a single line serial bus. Pin 3 is a no connection pin (NC). And pin 4 is GND ground, the negative power pin. The DATA pin should have a pull-up resistor of about 5.1K as suggested by the manufacturer. But any value from 4K7 to 10K will work fine.
Humidity Range goes from 20 to 90% Relative Humidity (RH). Humidity Accuracy is +/-5% RH. Temperature Measurement Range goes from 0 to 50 °C. Temperature Accuracy is +/-2% °C. Operating Voltage 3.5V to 5.5V (notice 3.3v is out of range)
See:
http://www.aosong.com/en/products-21.html
https://akizukidenshi.com/download/ds/aosong/DHT11.pdf
http://www.micro4you.com/files/sensor/DHT11.pdf
See also http://playground.arduino.cc/Main/DHT11Lib
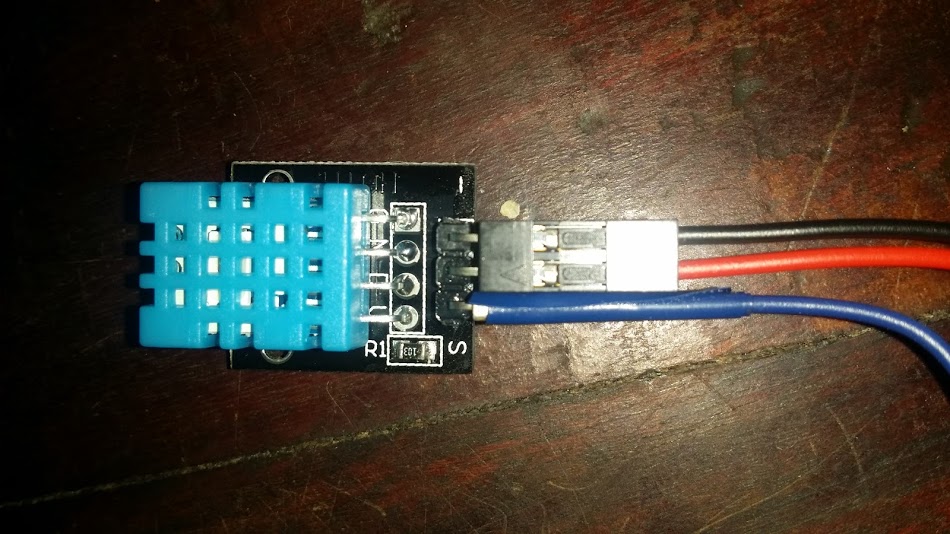
It can be bought alone or included in a brick or shield. In this case a brick is used and includes the 10K pull-up resistor. The Brick has only three pins. Pin 1 is SIGNAL/DATA. Pin 2 is VCC, and Pin 3 is GND.
There are other sensors with higher accuracy DHT21 and DHT22. The values are pulsed over a single digital line through a handshake (handshake for DHT21/22 is identical, data format differs).
We will use the IIC-LCD example to show Humidity and Temperature over an LCD Display. And will use Rob Tillaart DHTstable libraryhttps://github.com/RobTillaart/Arduino/tree/master/libraries/DHTstable 0.1.13. Download and unzip in your Arduino IDE library directory.
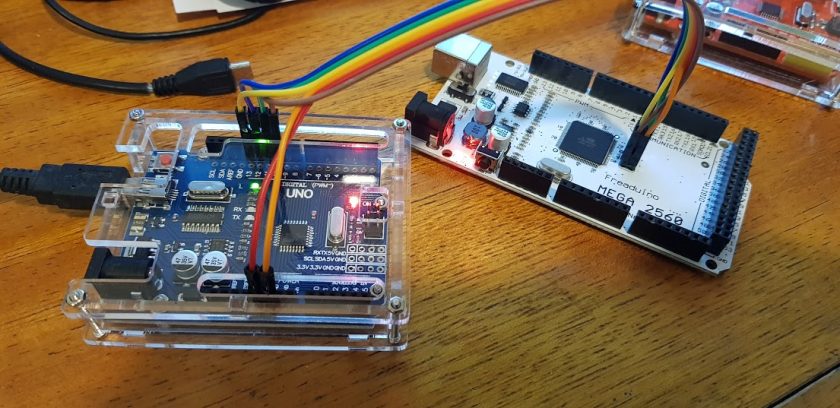
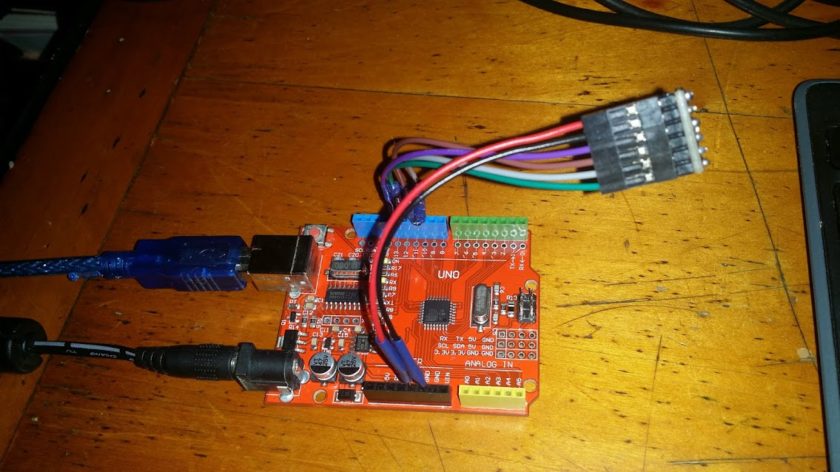
In this case we use an Arduino UNO Rev.3
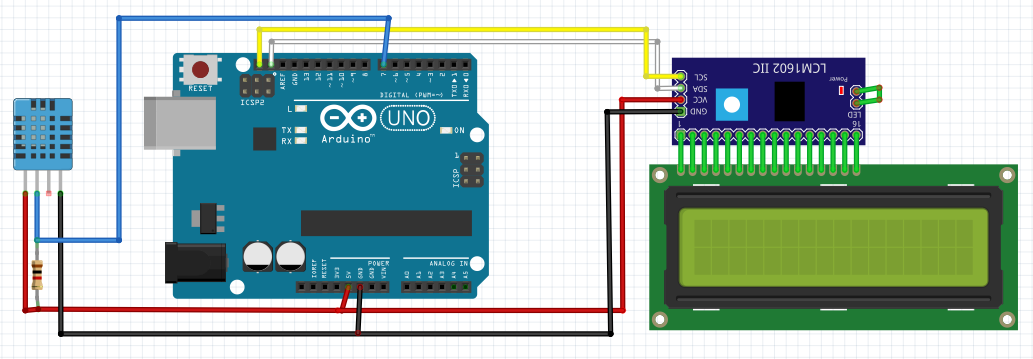
LCD-DHT11 Project layout
Now create a new sketch with the following code:
/**
* Enrique Latorres LCD Temp Humid Demo
*/
#include
#include
#include
#define I2C_ADDR 0x3F // 0x3F is the I2C bus address for my unmodified module
LiquidCrystal_I2C lcd(I2C_ADDR, 2, 1, 0, 4, 5, 6, 7, 3, POSITIVE);

// https://github.com/RobTillaart/Arduino/tree/master/libraries/DHTstable 0.1.13
#include
dht DHT;
#define DHT11_PIN 7   //Pin to connect signal pin of DHT11

void setup()
{
lcd.setBacklightPin(3,POSITIVE);
lcd.begin(16, 2);
lcd.setBacklight(HIGH);
lcd.clear();
lcd.setCursor(0,0);
lcd.print("Enrique Latorres");
lcd.setCursor(0,1);
lcd.print("LCDTempHumidDemo");
delay(3000); //Make sure you read my banner
}

void loop()
{
int chk = DHT.read11(DHT11_PIN); //Read DHT11 through the right pin
switch (chk)
{
case DHTLIB_OK:
lcd.clear();

lcd.setCursor(0,0);
lcd.print("Temp=");
lcd.print(DHT.temperature);
lcd.print((char)223);
lcd.print("C");

lcd.setCursor(0,1);
lcd.print("Hum=");
lcd.print(DHT.humidity);
lcd.print("%");

break;
case DHTLIB_ERROR_CHECKSUM:
lcd.setCursor(0,0);
lcd.print("Checksum error");
break;
case DHTLIB_ERROR_TIMEOUT:
lcd.setCursor(0,0);
lcd.print("Time out error");
break;
default:
lcd.setCursor(0,0);
lcd.print("Unknown error");
break;
}
delay(1000);
}
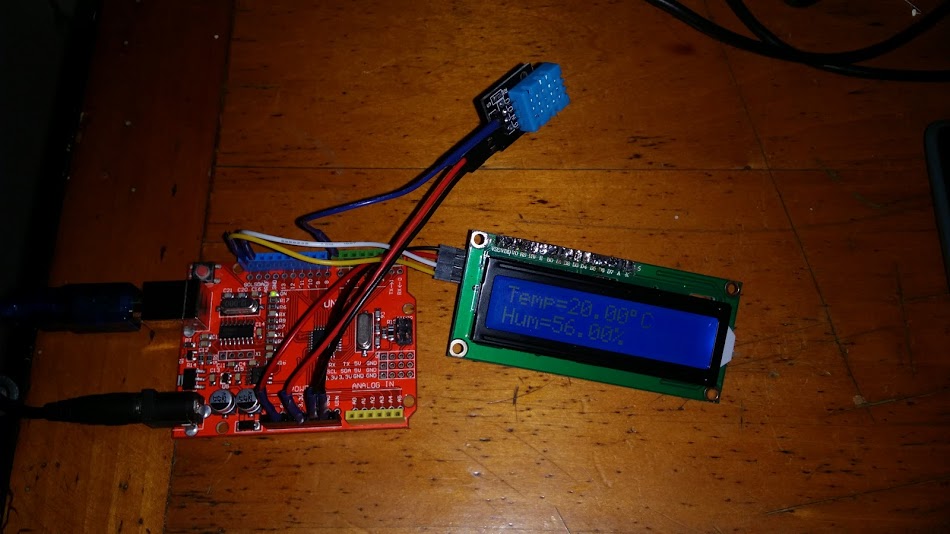
Compile, check and load. Your Arduino should be showing two lines on the LCD Display:
Temp=19.00ºC
Hum=58.00%
There are some functions to add Dew Point and Heat Index calculations that can be found on Internet and could be shown with a four line LCD Display for your weather station project.
DHT11-LCD project on
Regards